How to finish a screened porch ceiling, trim, and door details
September 10, 2026
Last updated: September 10, 2026
Key Takeaways
- Wrapping a 4×4 post? The real size is 3 1/2 inches, not 4.
- Add 1x material, and that wrapped post often lands near 5 1/2 inches square once the trim is on.
- Get the sequence wrong, and a decent porch starts looking pieced together.
- A problem shows up when the “finished” line lands on a wavy or unsupported edge.
A screened porch can look sharp, or it can look half-built. The difference usually comes down to three things: moisture control, movement, and clean transitions. I’m talking about the ceiling, the trim at posts and edges, and the door jamb, casing, and threshold — the bits that make the space feel planned instead of improvised.
Who this is for, and what it assumes you already have
This applies to a screened porch that already has its structure, screening, and roof in place, and where you’re deciding how to finish the visible surfaces. I’m assuming you already know the porch’s framing is sound, the roof sheds water properly, and the screen openings and door opening are framed close to final size. If the structure is still moving, rotting, or leaking, finish work is the wrong first move.
I’d treat this as finish carpentry, not cabinetry. Still, call a local finish carpenter or builder if the porch faces unusual moisture, movement, or code constraints. You’ll want a tape measure, a level, a miter saw, a drill/driver, a nailer or hand-nailing setup, exterior-rated fasteners, and the ability to scribe and shim. A stud finder only helps when the wall assembly actually gives you a solid nailing base behind the trim; on many screened porches, the “wall” is really posts, blocking, and screen track.
Exposure changes the answer. A porch under deep roof cover with little wind-driven rain can tolerate more material choices than one with an open side and a lot of splash-back. I would not use this approach on an enclosed room, a porch with active water intrusion, or any structure that still lacks a proper roof overhang and drip edge. Those need the building envelope solved first. For normal screened porches, though, the job is a careful sequence. Plain and simple.
One thing generic articles miss: a screened porch is not a dry interior. It cycles through heat, humidity, and temperature swings. So you need joints that can move a little, materials that tolerate exposure, and details that don’t trap water behind pretty trim.
What should a screened porch ceiling be finished with?
A screened porch ceiling should be finished with exterior-capable material that can handle humidity and seasonal movement, and the detail should be simple enough to dry out quickly. In practice that usually means tongue-and-groove boards, beadboard made for exterior use, or another moisture-tolerant panel system installed over a proper nailing base. Standard interior drywall has no good reason to survive on a porch that isn’t fully enclosed and conditioned.
Check the framing plane first. Run a 6-foot level or straightedge across the ceiling joists or furring. If you see more than about 1/8 inch of variation over that span, the finish will telegraph it. You do not need cabinet-grade perfection, but you do need a plane that won’t make every board look wavy. If the ceiling is open to framing, add furring strips or level strips before finish material. On a porch with insulated ceiling bays, leave the insulation strategy intact and still create a finish surface below it.
Use exterior-rated nails or screws, and keep them short enough not to punch into anything you don’t want seen from above. A common mistake is choosing fasteners by convenience and then discovering rust streaks in two seasons. I’d rather use stainless or hot-dipped galvanized fasteners on a porch ceiling, especially if the site is coastal or humid. The Fastener Manufacturers Association notes that corrosion resistance depends on exposure, so the porch location matters as much as the fastener label. See also the APA’s guidance on fastening exterior wood assemblies and the IRC requirement for corrosion-resistant fasteners where preservatives or exposure demand them.
Leave a small expansion gap at the perimeter, usually about 1/8 inch, then cover it with trim. Wood moves. A screened porch makes that movement more obvious. If you hard-fit boards wall to wall, you are inviting buckling.
Planning to paint the ceiling? Prime all sides of the boards if possible, or at least seal the cut ends and exposed faces before installation. That sounds fussy, but the edge grain is where moisture gets in first.
How do you trim the posts, corners, and ceiling edges?
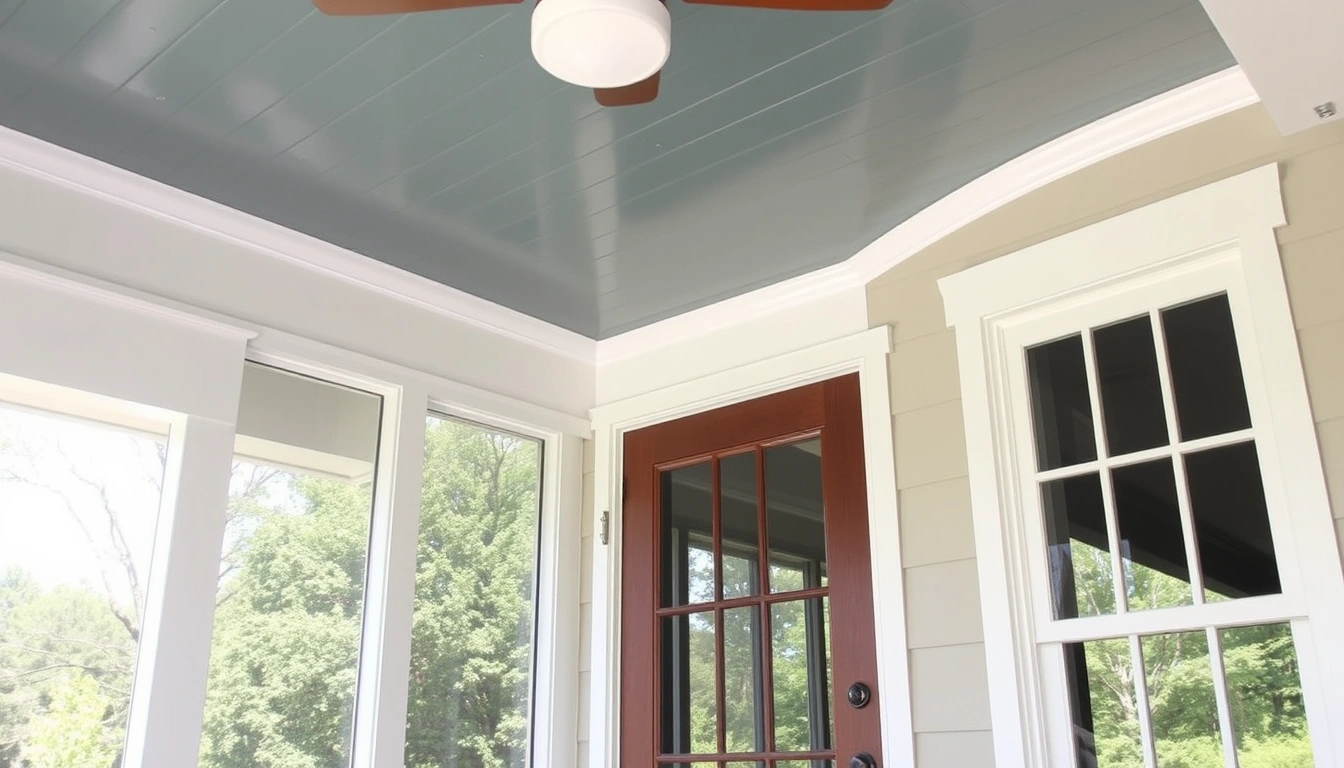
Give every transition a cover piece that hides movement without trapping water. That’s the trick. Simple profiles, sensible reveal lines, and joints that can be repainted later without tearing the porch apart.
Start at the ceiling perimeter. If you’re using tongue-and-groove ceiling boards, cap the edge with a flat trim board or small crown only if the roof geometry is forgiving. On a screened porch, I prefer plain 1x or 5/4 flat trim because it sheds less dust, collects less moisture, and is easier to match to the posts. Keep the reveal consistent — 1/8 inch to 3/16 inch is a normal visual target for a clean line. If the edge wanders, the eye catches it immediately.
For posts, decide whether you are wrapping structural posts or trimming only the faces. Full wraps look finished, but they also need room for post movement and seasonal checking in wood posts. If you’re wrapping a 4×4 post, remember that the actual dimension is 3 1/2 inches, not 4. A wrapped post with 1x material often ends up closer to 5 1/2 inches square once the trim lands. Fine, if the porch is large enough. On a small one, it can look bulky. A narrower build-out with corner boards may suit the space better.
Use mitered joints only where they’ll stay protected and accessible. I like square-cut butt joints at most porch trim because they’re easier to service and less likely to open at the point of the miter. A miter on an outside corner can look sharper on day one, but on a humid porch it often becomes the first gap you notice. If you do miter, back it with glue rated for exterior use and a hidden fastener pattern that does not split the trim.
At the floor line, don’t bury trim tight to the decking. Leave a small gap — around 1/4 inch — so water can drain and boards can move. Trim that sits in standing water is trim that fails early. The same goes for screen track and corner posts: keep the trim proud and accessible instead of buried behind caulk.
How do you finish a screened porch door so it closes right and still looks clean?
Build the jamb, casing, threshold, and weather details so the door swings freely, latches cleanly, and doesn’t drag as the season changes. The door opening is where sloppy trim gets exposed, because you touch it every time you go in or out.
Set the jamb plumb and square before you think about casing. Check both jamb legs with a level and compare the diagonals of the frame. If the diagonals differ by more than about 1/8 inch on a typical porch door opening, fix the frame now. A door can only forgive so much. If the hinge side leans or the latch side bows, you will chase the problem with shims forever.
Use an exterior-rated screen door or porch door with a frame stiff enough to resist sag. A lightweight door hanging on two undersized hinges will start rubbing quickly, especially if the porch gets sun on one side. Three hinges are a good default for a full-height door because they spread the load and help control sag. Use screws long enough to bite framing, not just trim. The IRC and the AWI’s installation guidance both emphasize fastening into solid backing, not just finish stock.
For the threshold, aim for a detail that sheds water without creating a toe-stubber. A low-profile saddle or threshold works better than a tall interior-style threshold on a screened porch. Leave enough clearance under the door for air and seasonal swelling, but not so much that leaves and insects blow through. The exact gap depends on the door style, but the target is a controlled, even reveal rather than a big daylight strip.
Casing should read as a frame, not as a patch. I like casing that lines up with the head trim and does not crowd the hinges. If the door is painted, caulk only where the trim meets the structural backing, not across every moving joint. Caulk is not a substitute for fit. Around a porch door, too much caulk just peels.
If the door swings outward — common on screened porches — make sure the exterior side has enough landing area and the screen detail doesn’t interfere with hardware. A stop moulding or simple door stop should be placed so it catches the door without crushing the screen frame.
What are the steps to finish it cleanly from framing to paint?
Finish it in an order that keeps you from painting yourself into a corner. Prep, dry-fit, install, fill, seal, then paint. That sequence matters; mess with it and a good porch starts wearing the evidence.
- Map every plane and opening. Measure ceiling length, width, post locations, and the door opening at both top and bottom, then mark the actual finished lines on framing with a pencil. Verify that you know where trim will land before cutting material. A problem shows up if the “finished” line lands on a wavy or unsupported edge.
- Correct framing out of plane. Add furring strips, shims, or blocking so the ceiling and trim have a true nailing surface. Use a 6-foot level or straightedge to find dips and humps. A problem shows up if the trim has to bridge more than about 1/8 inch without support.
- Pre-prime or seal exposed material. Coat cut ends, back edges, and any end grain before installation, especially on wood. Verify coverage at corners and rabbeted edges. A problem shows up if raw end grain is still visible after the piece is hung.
- Install the ceiling first. Fit boards or panels with a small perimeter gap, usually about 1/8 inch, and fasten into framing or furring on a consistent pattern. Verify board alignment every few courses. A problem shows up if seams drift or boards begin to bow.
- Wrap or cap the posts next. Cut trim to actual measured lengths, then dry-fit before fastening. Verify that corners meet cleanly and that the wrap doesn’t interfere with screen track or door casing. A problem shows up if the wrap forces the post trim out of square.
- Set the door jamb and threshold. Shim until the jamb is plumb and the reveals are even, then fasten and recheck swing. Verify a consistent gap around the door, usually around 1/8 inch to 3/16 inch depending on the door. A problem shows up if the latch needs force or the hinge side starts to bind.
- Install casing and edge trim. Keep reveals consistent and leave movement gaps where trim meets dissimilar materials. Verify that trim edges align with adjacent boards and that fasteners are set below the surface. A problem shows up if the casing telegraphs a crooked jamb or splits at the corners.
- Fill, caulk selectively, then paint. Use exterior-rated filler on nail holes, and caulk only at static joints where water could enter, not across every seam. Verify that joints are clean and that water can still drain out. A problem shows up if caulk bridges a moving joint or hides an uneven fit you should have corrected earlier.
Paint or finish should go on after the materials acclimate to the porch for at least a day or two, longer if the material stack came from a cold garage into a hot humid site. I can’t give you a universal drying time because climate matters, but here’s the honest rule: if the material still feels damp, wait.
What mistakes actually ruin the finished look?
The mistakes that ruin the look are usually about movement, moisture, or bad sequencing, not fancy trim profiles. A porch can have decent material and still look wrong if the details fight the environment.
-
Using interior drywall or interior trim stock. The consequence is swelling, joint failure, and soft corners after humidity swings. The better alternative is exterior-rated board, trim, or moisture-tolerant paneling chosen for a porch, not a living room.
-
Cutting trim to a tight, no-gap fit. The consequence is buckling or split joints when the porch expands and contracts through the season. Leave small perimeter gaps, then cover them with trim.
-
Overusing caulk. The consequence is cracked beads, trapped water, and a trim package that looks smeared instead of crisp. Caulk only static joints; fix the fit where the movement is real.
-
Ignoring the door reveal. The consequence is a door that rubs, slams, or refuses to latch without a shove. The correct alternative is to square the jamb first and check reveals before casing goes on.
-
Choosing decorative profiles that are too busy. The consequence is trim that catches dirt, holds moisture, and makes a small porch feel cluttered. Simpler flat stock usually ages better on screened porches.
-
Fastening through the wrong layer. The consequence is loose trim, popped nails, or a weak hinge side. Fasten into framing or solid blocking, not just into a thin edge of finish material.
I’d rather see a plain porch with straight joints than a fancy one with swollen miters. On a screened porch, restrained details usually win.
When should you change the plan instead of forcing the standard approach?
Change the plan whenever the porch’s conditions make a normal wood-trim-and-paint finish a bad fit. That isn’t failure; it’s matching the assembly to the site.
Active roof leaks or staining at the ceiling: the porch is still getting wet from above — stop finish work and solve the leak first, or the ceiling will fail behind the paint.
Posts that are out of plumb by more than about 1/4 inch over door height: the opening is too far out for trim to hide — rework the framing or the jamb will never hang right.
Screen track or corner hardware already occupies the trim line: the details are crowded — switch to narrower trim or a different casing profile